Scanning in a new overlay
To scan an overlay:
- Choose File > Scan Overlay to start scanning.
- Place the painted cel face down on the scanner pegbar, like paper artwork; then place the colored paper on top of the cel, between it and the scanner lid.
- Scan the overlay.
- You'll then be prompted to change the backing paper:
- After the second scan, ScanBackground calculates which regions to make transparent and displays the resultant image in the Splice Window:
If you were able to fit all your overlay on the scanner, you've now finished.
However, if you need to add another section to the overlay:
- Choose File > Scan Overlay again.
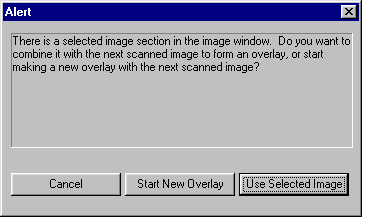
- In the dialog that appears, click on Use Selected Image:
- Click on Use Selected Image.
- Scan the new section in the same way as the first section (see above).
- Splice the sections together in the same way as for a background (see Splicing the image sections).
- If you've made a mistake, and don't want to add another section, you can instead:
- Click on Cancel to keep the selected image
- Click on Start New Overlay to discard the selected image and start a new overlay.


